How to customize the submission confirmation


You have already turned your PDFs into forms and are receiving submissions directly to your email inbox.
However, in industries like insurance, real-estate or healthcare, one form often isn't enough.
Typically, you might send two SimplePDF form links to your customers and ask them to fill out both.
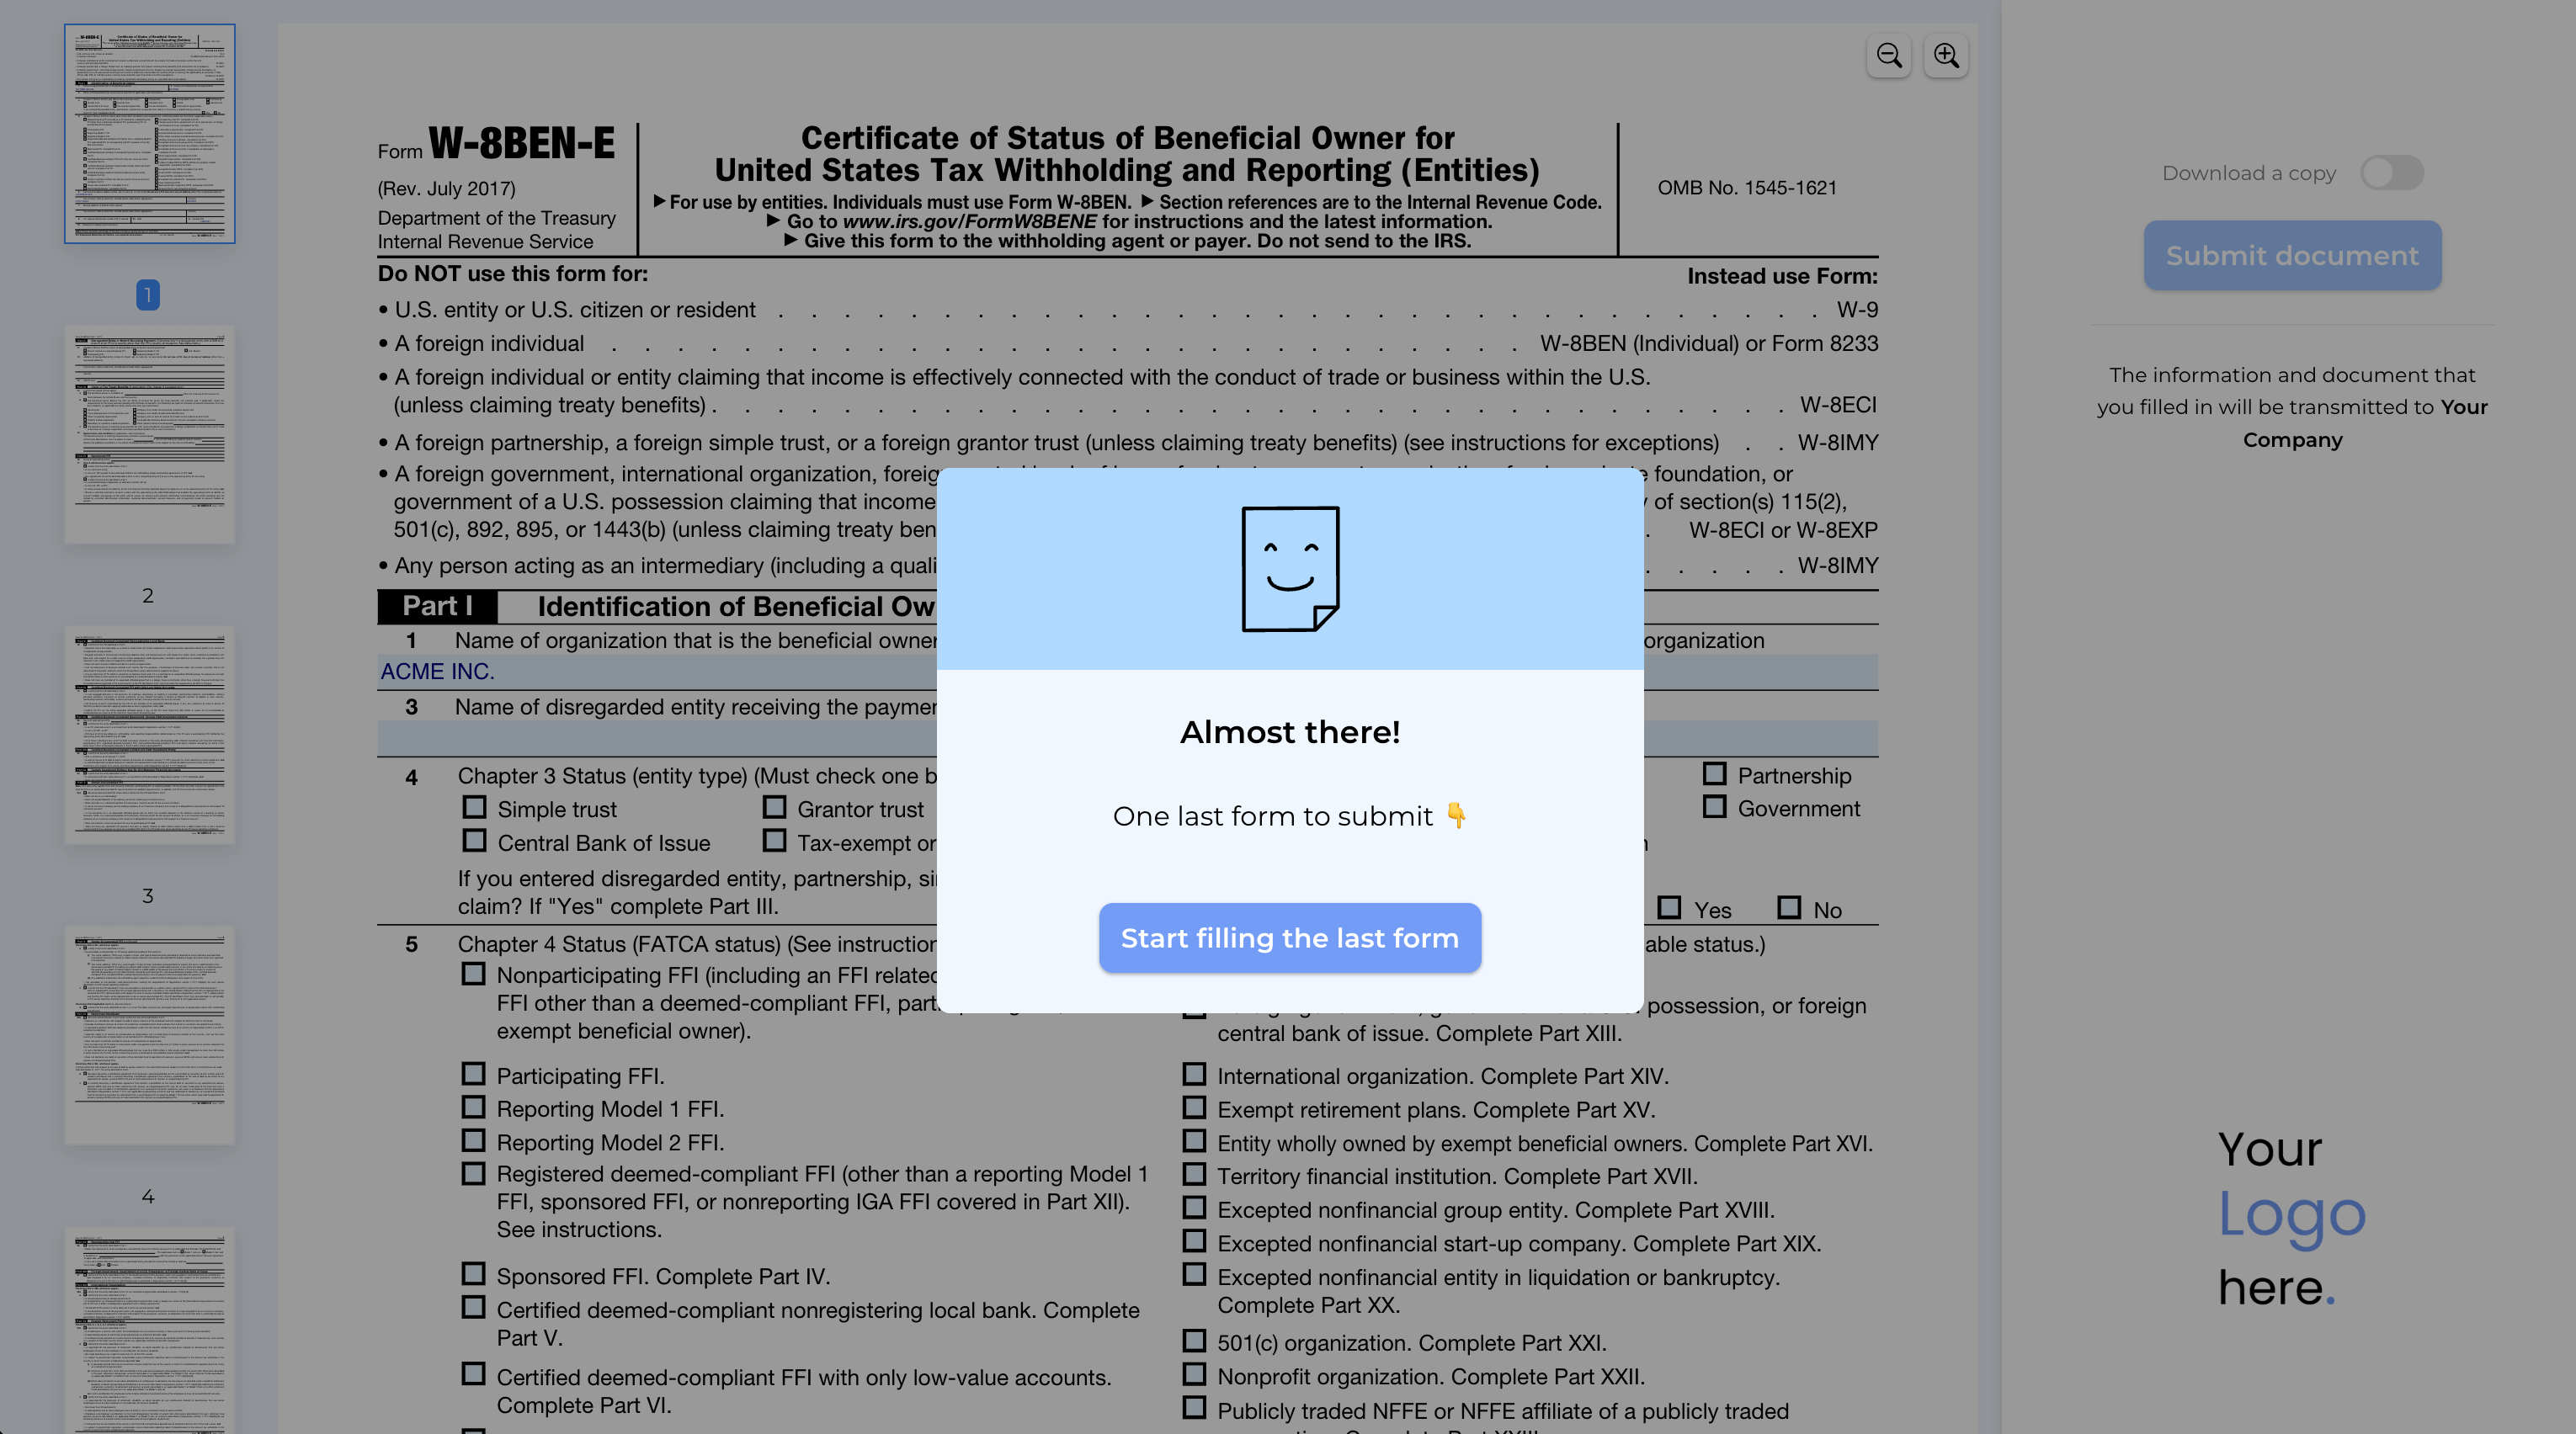
But what if you could send just one form, and after it's submitted, your customers are automatically prompted to fill out the second one?
Or perhaps you want to guide them to explore your services after they complete the form.
You can easily achieve this by customizing the submission confirmation, which is what we'll cover in this tutorial.
Customizing the submission confirmation.
Customizing the submission confirmation is available with the PREMIUM plan
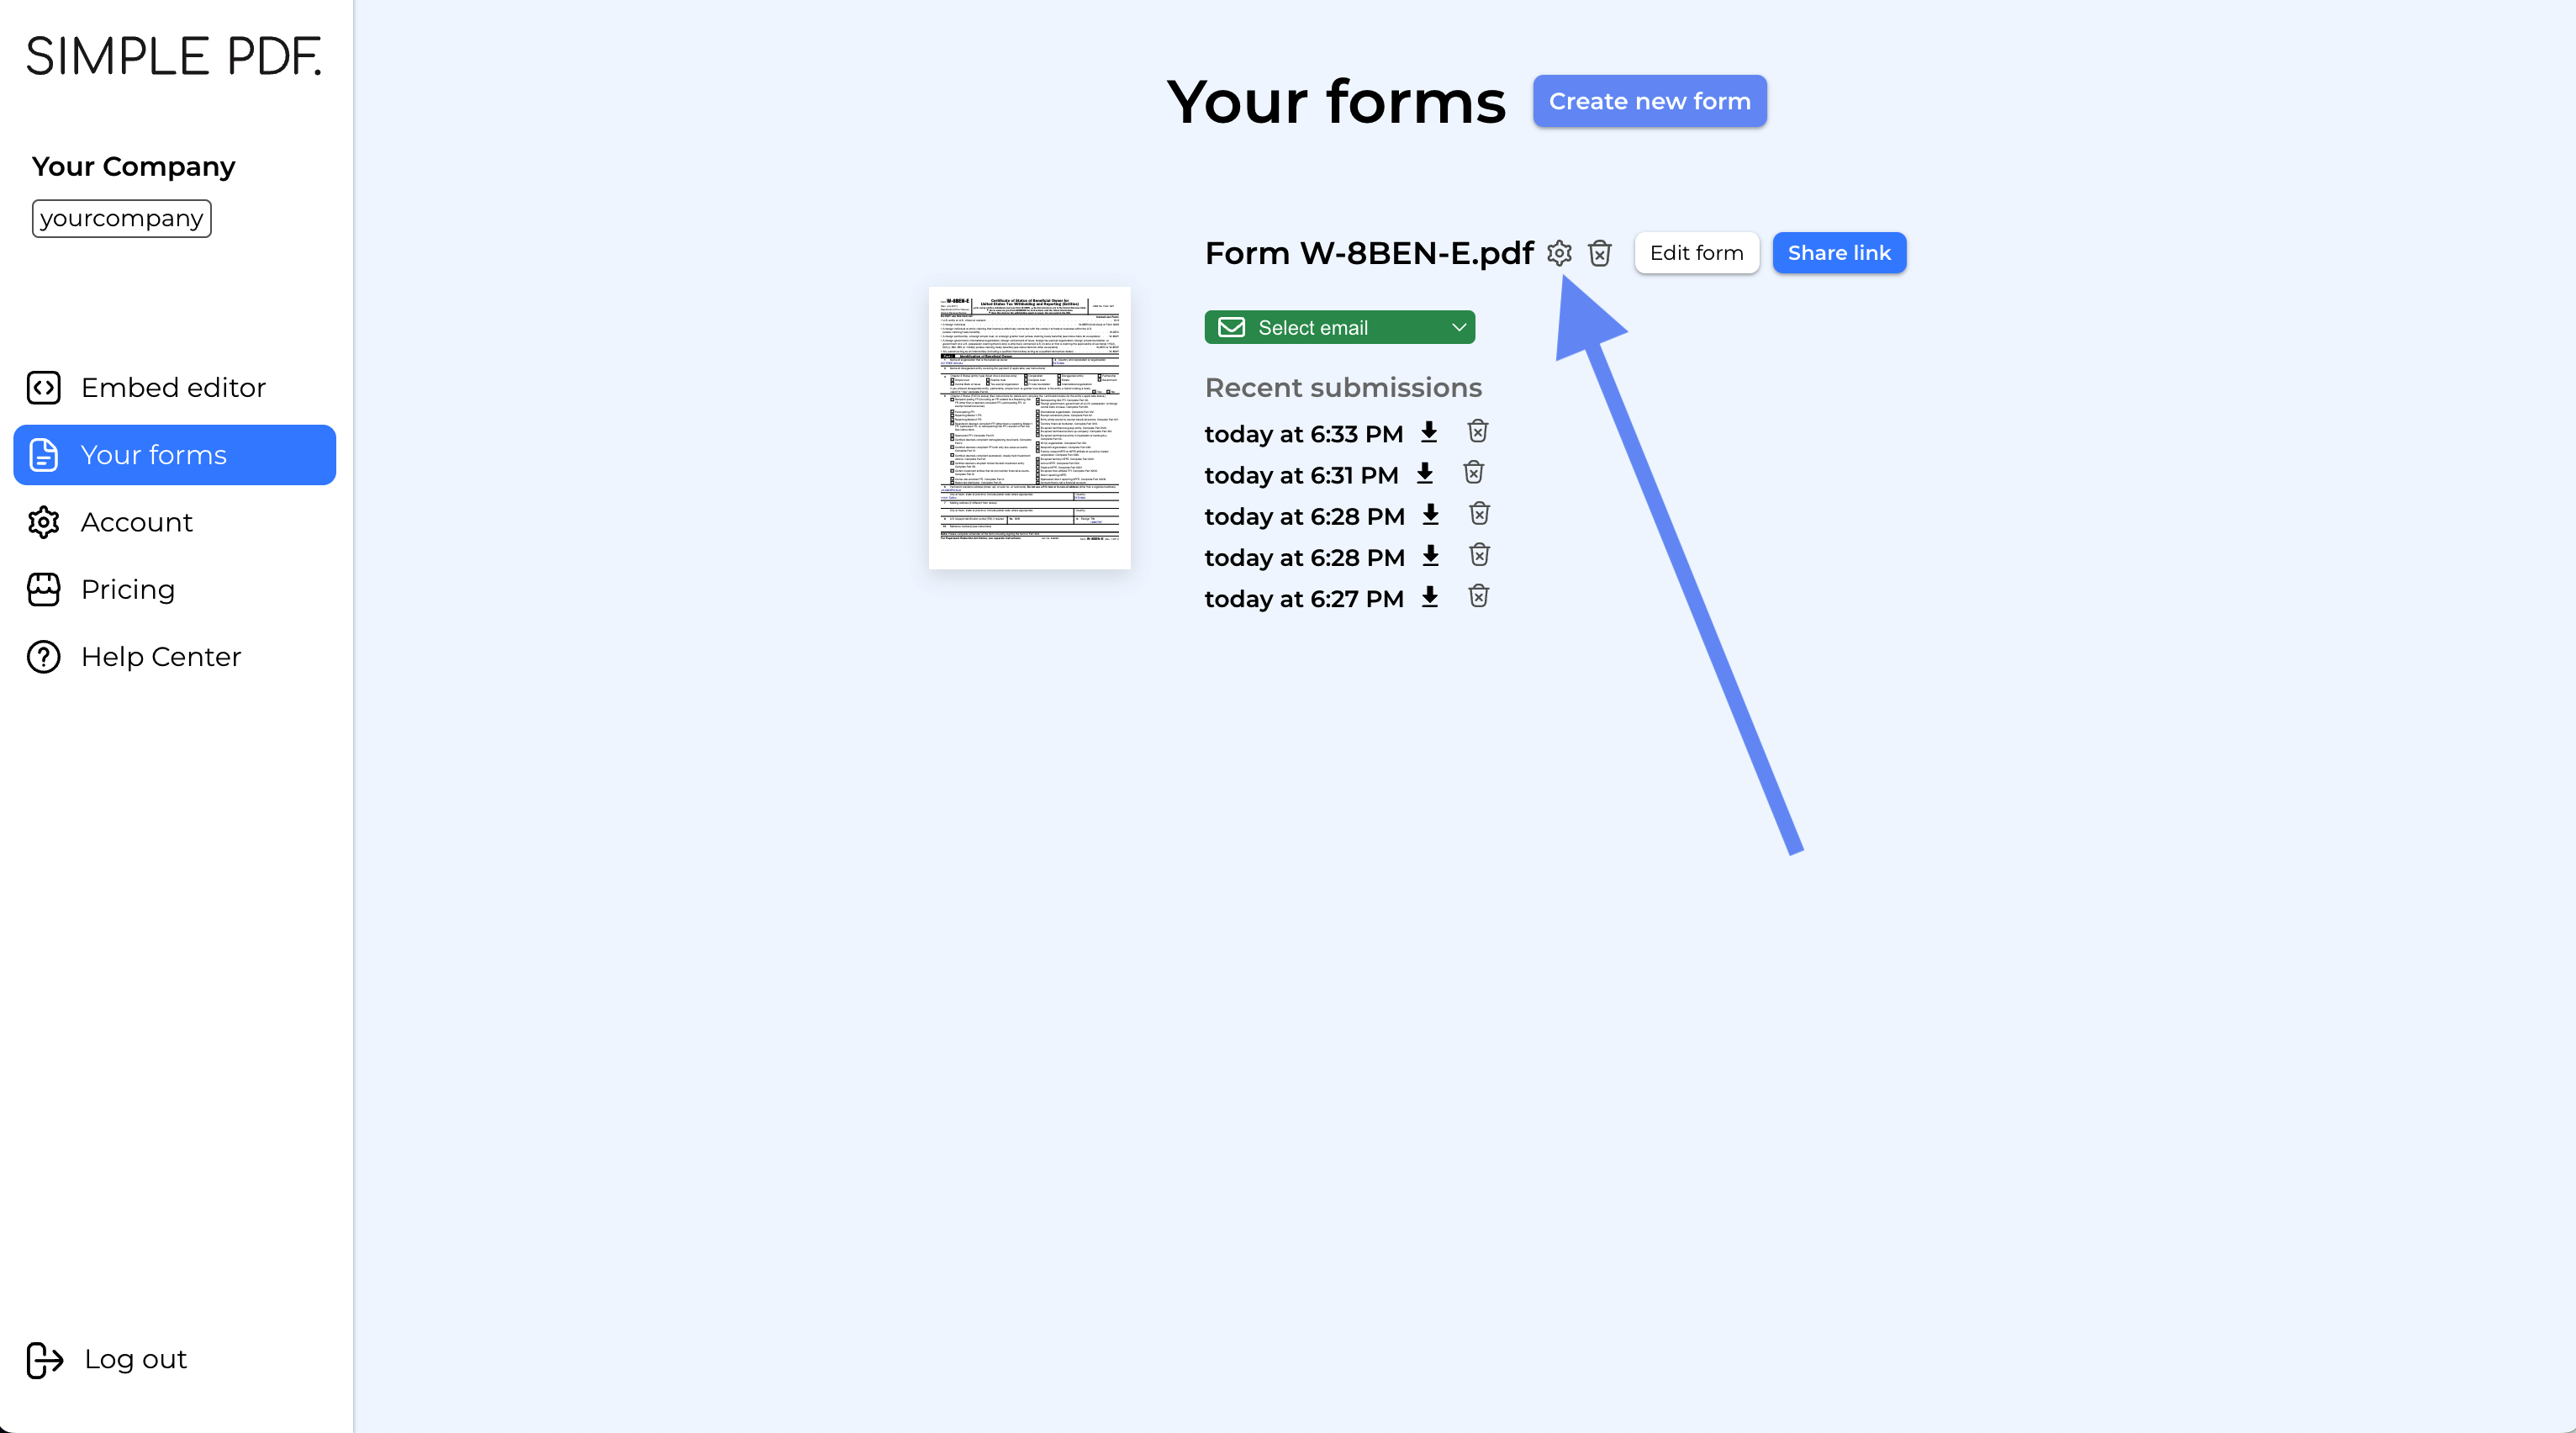
- Log into your account and go to the "Your forms" page.
- Click the
cogicon next to any form you've created to open the configuration view.

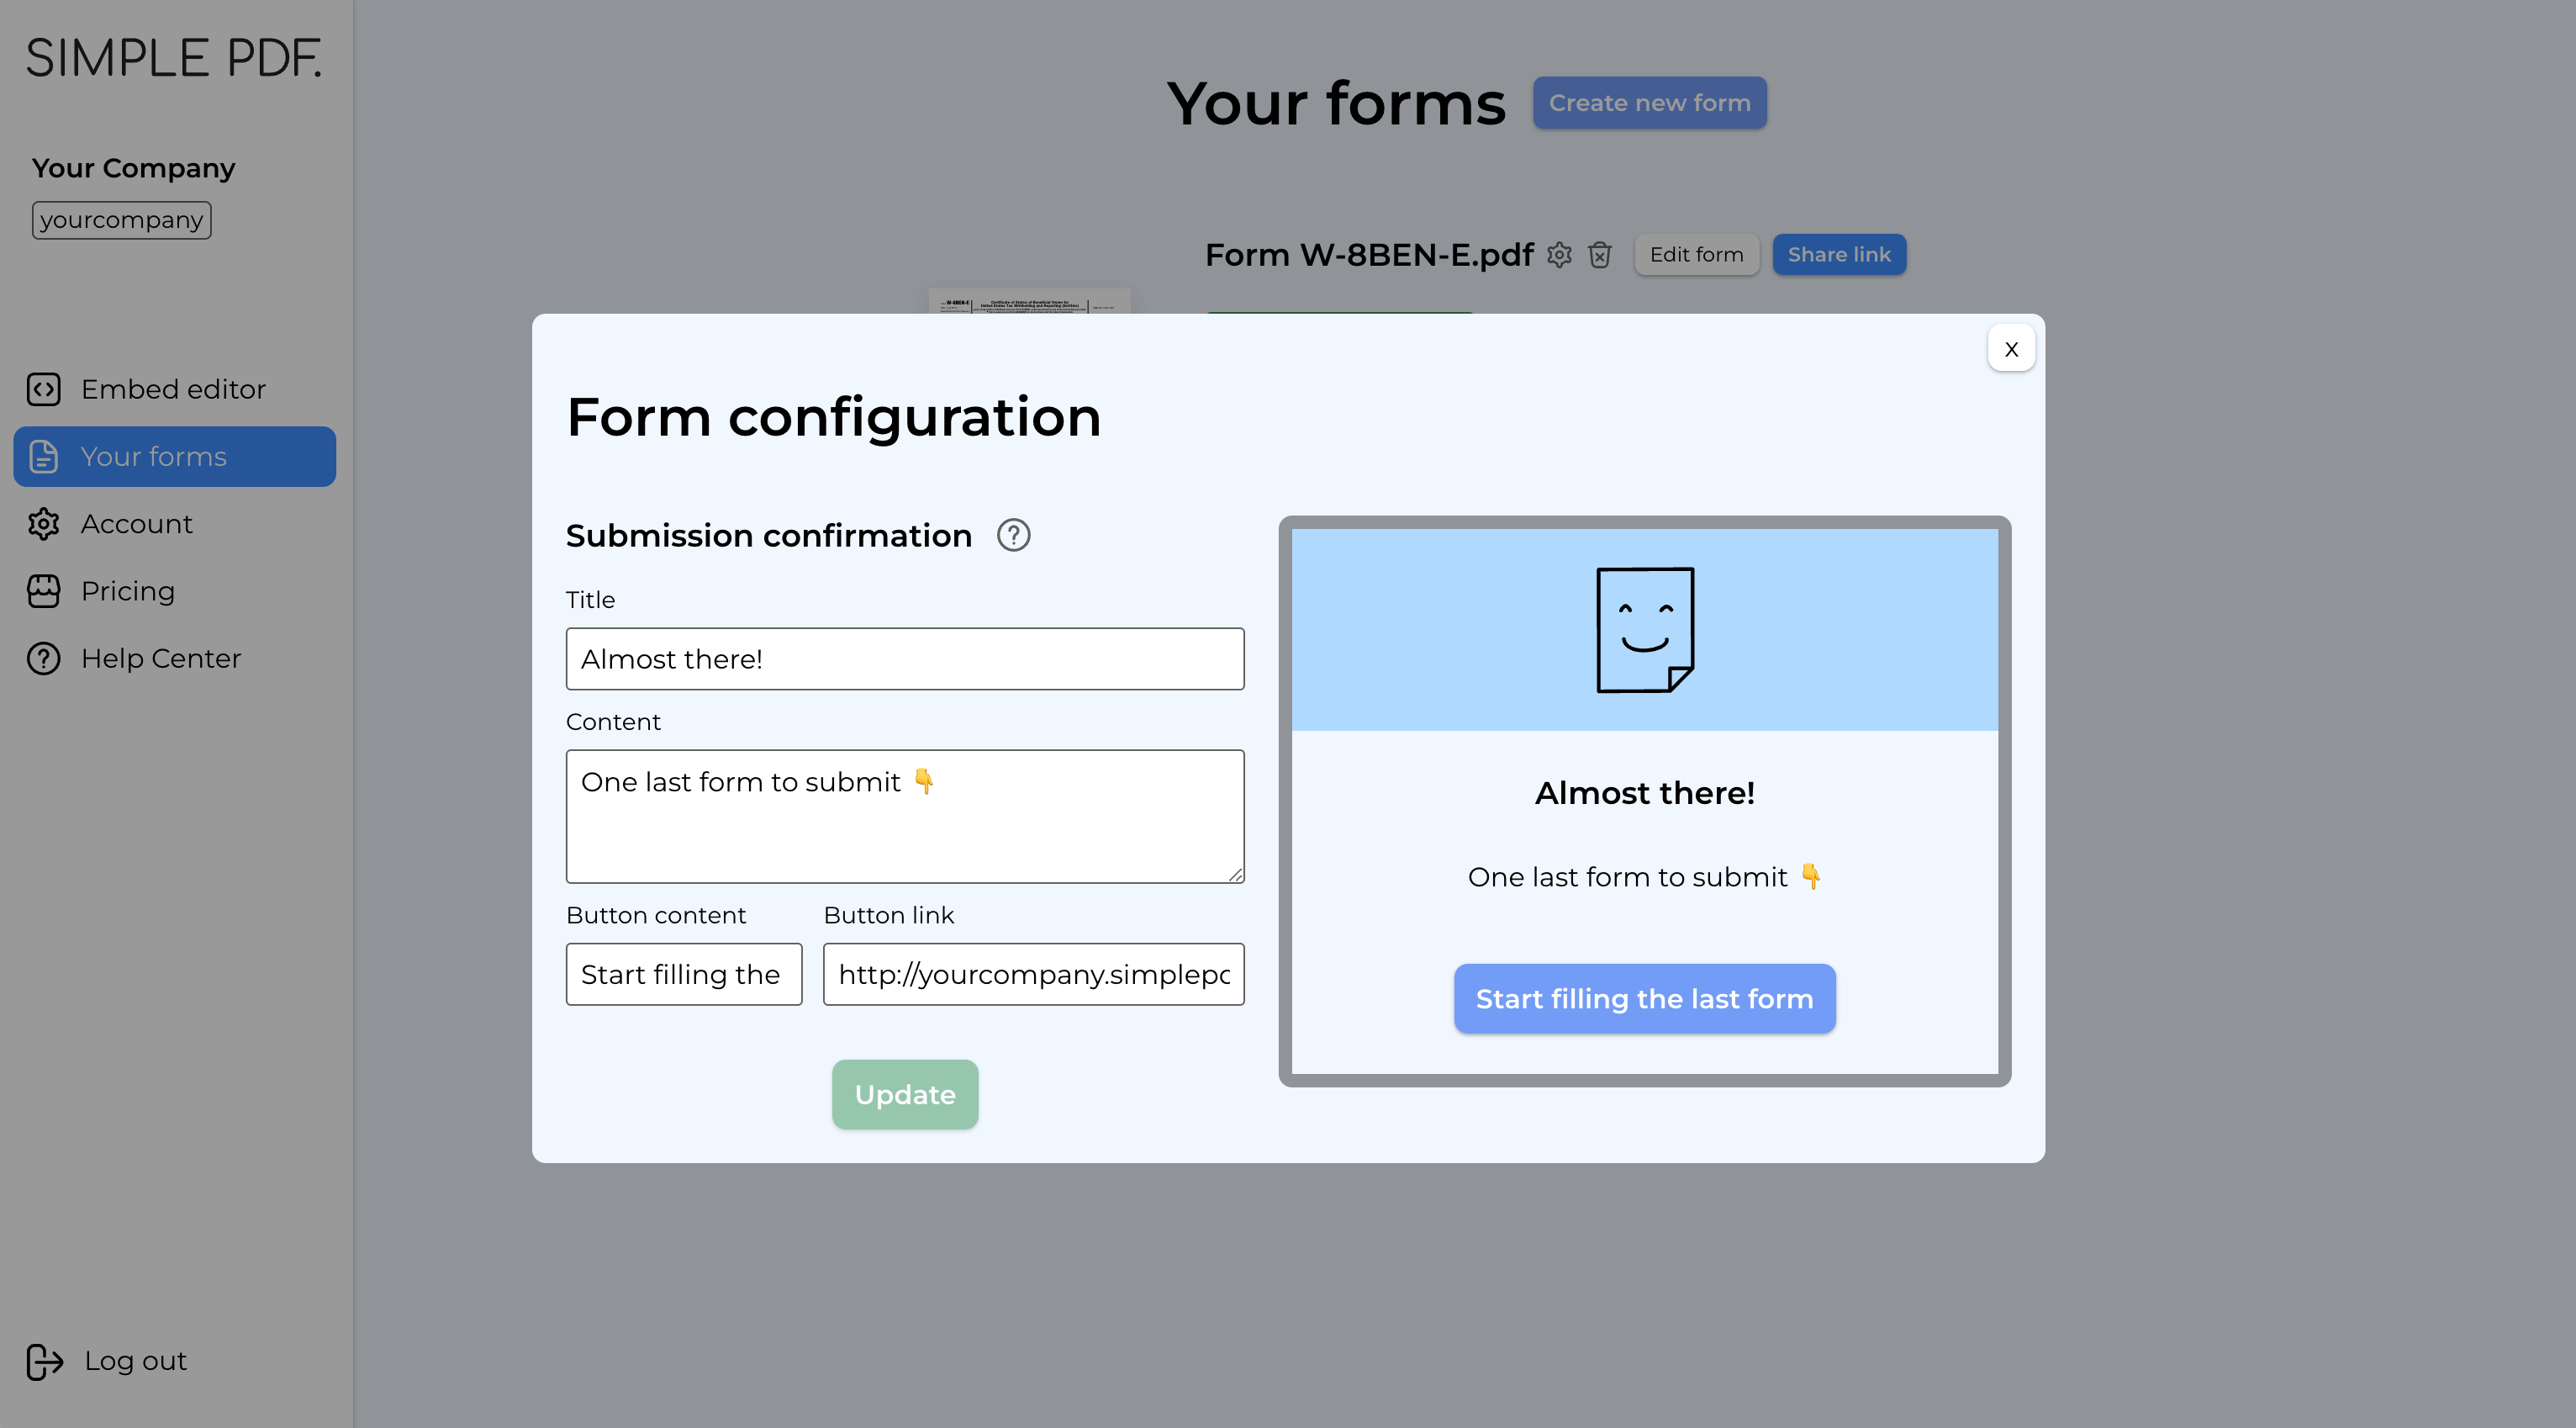
- Modify the title, content, and add a link. Your changes will be visible in the preview on the right side.

- Click
Update
That's it! Now, whenever your customers submit this form, the confirmation message will display the information you configured.

You can direct your customers to a specific website or another SimplePDF form.
Plus, there's no limit—each form can lead to another form, creating a seamless flow for your customers!
If you have any questions, feel free to reach out to support@simplepdf.eu
You may also be interested in
- Customize the editor and add your own branding
- Get email notifications on PDF form submissions
- Configure your own S3 bucket for PDF form submissions
- Configure Webhooks to get notified of new PDF form submissions
- Save the PDF submissions to your Bubble Database using Bubble workflows
- Connect SimplePDF with Activepieces to automate your PDF forms processing
- Use the Robocorp integration to leverage AI in your IDP workflow
- Add the embed PDF editor to a Next.js App
- View and edit PDF in Excalidraw